A clean cooker isn’t just about appearances — it works better, lasts longer, and is safer to use. Burnt-on food reduces hob efficiency, grease buildup in the oven affects heat distribution, and clogged ventilation slots can cause overheating. Here’s how to clean and maintain every type of electric cooker, from induction to ceramic to portable hobs.
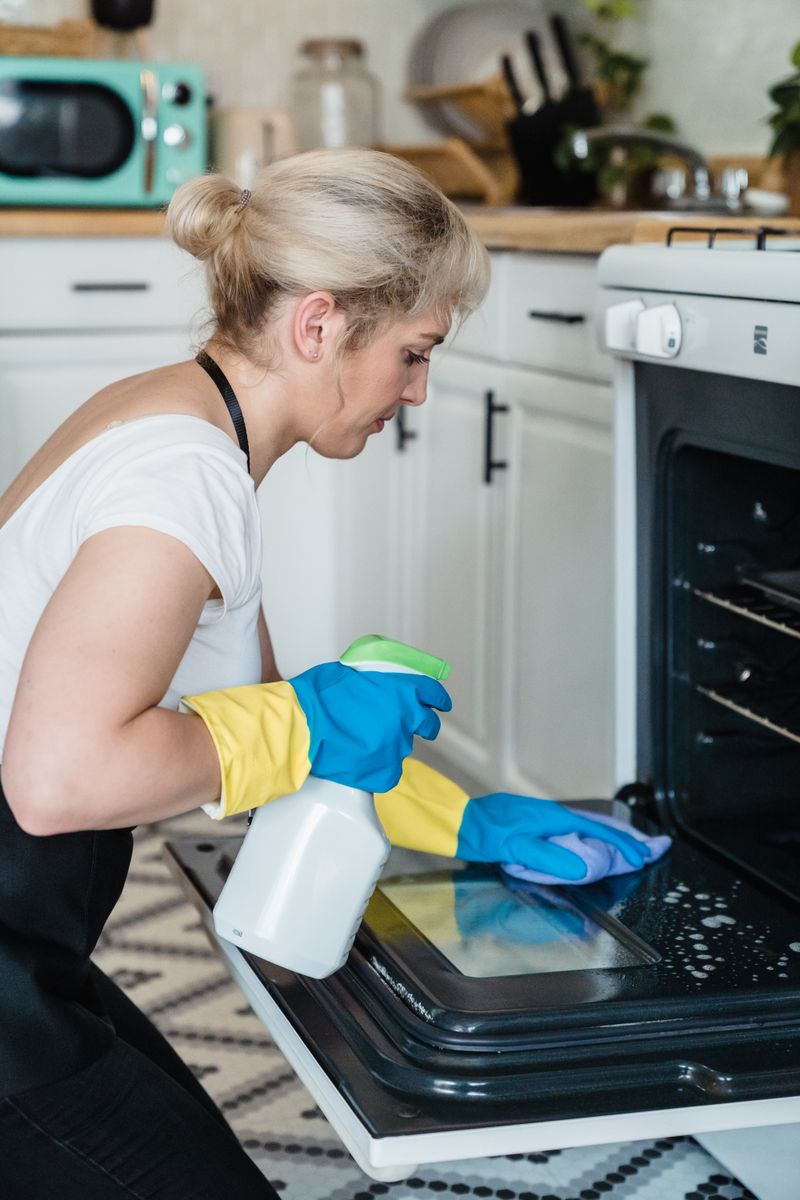
Daily Cleaning (All Hob Types)
Disclosure: This post contains affiliate links. If you purchase through them, we earn a small commission at no extra cost to you. Learn more.
The golden rule of cooker cleaning is simple: clean spills as soon as the surface is cool enough to touch. Burnt-on food is much harder to remove than fresh spills.
| Task | How often | Why it matters |
|---|---|---|
| Wipe the hob after cooking | Every use | Prevents spills baking on |
| Wipe oven interior splatters | After each use | Stops grease buildup |
| Empty air fryer drawer | After each use | Baked-on grease is much harder to shift later |
| Wipe down control knobs | Weekly | Grease attracts more grease |
| Check crumb trays (mini ovens, air fryers) | Weekly | Prevents smoking and smells |
What you’ll need for daily cleaning:
– A microfibre cloth (cheap on Amazon, machine-washable)
– Mild washing-up liquid and warm water
– A separate dry cloth for buffing
What to avoid on all hob types:
– Abrasive scouring pads (Brillo pads, green scrubbers)
– Oven cleaner spray on glass hobs
– Metal scrapers on any glass surface
How to Clean an Induction Hob

Michelle Kinsey Bruns / Wikimedia Commons / CC BY 2.0
Induction hobs are the easiest type to clean because the glass surface doesn’t get hot enough to burn food on. The pan heats up, but the hob stays relatively cool — so spills don’t bake on the way they do with ceramic.
The right way:
- Wait for the hob to cool — induction hobs cool in seconds (they were never really hot), but the residual heat indicator may stay on for a minute or two
- Spray with a dedicated ceramic hob cleaner — brands like Hob Brite, E-Cloth, or own-brand from John Lewis all work well
- Wipe with a soft microfibre cloth — circular motions, light pressure
- Buff dry — a second clean cloth gives a streak-free finish
- For stubborn marks — use a plastic-blade hob scraper (available at any supermarket for ~£5) at a 45° angle to lift dried-on residue without scratching
- For burnt sugar or milk — apply a small amount of cleaner, let it soak for 2–3 minutes, then scrape gently
Common mistakes:
- Abrasive sponges — they’ll leave micro-scratches that become more visible over time
- Oven cleaner — too harsh for induction glass, can damage the surface permanently
- Metal scrapers — will scratch the glass. Only use the plastic-blade scraper designed for hobs
- Dragging pans — always lift pans, don’t slide them. Even a grain of salt between pan and glass can scratch
If you’re using a portable table-top induction hob, the glass is the same material as a built-in. Unplug it first, then wipe with a damp cloth and mild detergent. Pay attention to the ventilation slots — keep them clear with a dry brush or vacuum attachment.
What about the edges?
Induction hobs are usually flush-mounted. Spills can seep down the edges if you’re not careful. Wipe around the seal weekly with a damp cloth. If you notice lifting or peeling of the seal, replace it promptly — moisture getting under the hob can damage the electronics.
How to Clean a Ceramic Hob

Ceramic hobs are more demanding. They get much hotter than induction, so spills bake on hard and fast. Burnt sugar and milk are the worst offenders because they fuse to the glass.
- Let the hob cool completely — ceramic stays hot for 20–30 minutes after use. Never clean a hot ceramic hob; you risk burns and the cleaner may smoke
- Apply ceramic hob cleaner — squirt a small amount (about a 10p-sized blob per zone)
- Let it soak — 1–2 minutes for light soiling, 5 minutes for baked-on deposits. The cleaner needs time to soften the residue
- Wipe with a damp microfibre cloth — use firm, circular pressure
- Scrape if needed — a plastic-blade scraper at a 45° angle lifts stubborn burnt-on food. Metal scrapers will scratch
- Buff dry — streak-free finish with a clean dry cloth
Dealing with specific stains:
| Stain type | Best approach |
|---|---|
| Burnt sugar / jam | Hob scraper + cleaner. Sugar crystallises onto the glass — scraping is the only way |
| Milk / cheese | Soak cleaner for 5 minutes, then wipe. Repeat if necessary |
| Plastic (melted bag) | Let it cool completely, scrape off carefully with a plastic blade |
| Aluminium (from pan base) | Use a specialist cleaner designed for aluminium marks |
| Limescale | White vinegar on a cloth, then rinse and buff |
Preventing scratches:
- Always lift pans — never slide them across the surface
- Check pan bases — rough, damaged, or dirty pan bases act like sandpaper
- Keep the hob clean — even a single grain of salt or sugar between pan and glass causes micro-scratches
- Use the right scraper — only plastic-blade scrapers designed for ceramic hobs
Renter’s scenario: “I spilled a sugar syrup on my ceramic hob and didn’t notice until the next morning. It had baked into what looked like a permanent white stain. I tried everything — vinegar, baking soda, even a razor blade (bad idea — scratched the glass). Eventually I bought a £6 tub of Hob Brite, applied it, let it sit for 10 minutes, scraped with a plastic scraper, and the stain came right off. I now keep the cleaner under the sink and wipe the hob after every use. Lesson learned.” — Rachel, Leeds
How to Clean a Portable (Table Top) Induction Hob
Portable induction hobs use the same glass-ceramic surface as built-in models, but they need a slightly different cleaning approach because of the ventilation requirements.
- Unplug first — always disconnect from the mains before cleaning
- Wipe the glass — damp cloth with mild detergent or ceramic hob cleaner
- Clean the ventilation slots — use a dry pastry brush, soft paintbrush, or vacuum with a brush attachment to remove dust and grease from the air intake and exhaust slots
- Dry thoroughly — especially around the controls and vents
- Store properly — keep the hob upright or flat, with nothing stacked on top that could scratch the surface
Portable hobs are more prone to overheating than built-in models because they have smaller ventilation channels. Keeping the slots clear is the single most important maintenance task for longevity.
Oven Cleaning

Tony Webster / Wikimedia Commons / CC BY 2.0
Self-Cleaning (Catalytic)
Catalytic liners are absorbent panels (usually on the back wall and sometimes the sides of the oven). They absorb grease during normal cooking. When the oven reaches a high temperature (over 200°C), the grease burns off, leaving a fine ash.
To maintain catalytic liners:
– Wipe the oven base occasionally — grease can pool there even with liners
– Run the oven empty at 220°C for 30 minutes if you notice excessive grease buildup
– Do not use oven cleaner on catalytic liners — it destroys the absorbent coating
– Catalytic liners have a lifespan of about 5 years before they need replacing
Self-Cleaning (Pyrolytic)
Pyrolytic ovens run a dedicated high-temperature cycle (around 500°C) that turns all food residue inside the oven into ash.
How to use pyrolytic cleaning:
1. Remove oven racks and bakeware (some models allow racks to stay in — check your manual)
2. Wipe large spills manually first (too much food can cause smoking)
3. Close the oven door — it will lock automatically during the cycle
4. Select the pyrolytic cycle (usually 1.5–3 hours)
5. The oven heats to ~500°C, burning everything to ash
6. After cooling, wipe the ash out with a damp cloth
7. Open windows — the process can produce some smell and smoke
How often: Every 3–6 months, depending on use. If you roast frequently, err towards every 3 months. The cycle uses significant electricity (around 2–3kWh per cycle, costing about 60–90p), so don’t run it unnecessarily.
Standard Ovens (No Self-Cleaning)
For conventional ovens without self-cleaning features:
- Remove racks and soak them — in hot, soapy water or a dedicated rack cleaner
- Apply oven cleaner — spray or gel, following the manufacturer’s instructions
- Leave for the recommended time — typically 15–30 minutes. Don’t exceed it, as some cleaners can damage enamel
- Wipe clean — use a damp cloth or sponge. Repeat if necessary
- Rinse thoroughly — residual cleaner can affect food taste. Wipe with a clean, damp cloth multiple times
- Dry — leave the door open for an hour to air out
Top tip: Place a bowl of white vinegar and water in the cold oven overnight before cleaning. The vinegar steam softens baked-on grime and makes the cleaning job much easier.
The Oven Door — Often Forgotten
The inner glass of the oven door gets covered in grease splatters. Most modern oven doors have removable inner glass panels:
- Check your manual for removal instructions (usually clips at the top or sides)
- Remove the inner glass panels
- Wash in warm, soapy water or soak in oven cleaner
- Dry thoroughly before reassembling
- Check the door seal (the rubber gasket around the door) for wear — a damaged seal wastes heat and affects cooking performance
Reminder: Don’t use oven cleaner on the outer door surface or control panel — it can damage the finish. Stick to warm soapy water and a soft cloth for those areas.
Maintenance Schedule
| Frequency | Tasks |
|---|---|
| After each use | Wipe hob surface, wipe oven interior splatters, empty air fryer drawer |
| Weekly | Check crumb trays (air fryers, mini ovens), wipe control knobs and door handles, check hob for stubborn stains |
| Monthly | Deep-clean hob with dedicated cleaner, check ventilation slots (especially on portable hobs), clean oven interior if needed, run pyrolytic cycle (if available) |
| Every 6 months | Check oven door seals for wear, clean under oven (pull it out carefully if accessible), descale kettle (if in the same area), check cooker control unit for damage |
| Annually | Replace oven door seals if worn, check cable and plug (13A models) for damage, professional service if under warranty requires it |
What to Buy — Recommended Cleaning Products
| Product | Use for | Price |
|---|---|---|
| Hob Brite (kitchen roll tub) | Induction and ceramic hobs | ~£6 |
| E-Cloth hob cleaning cloth | Daily wipe-downs (water only) | ~£10 |
| Plastic hob scraper | Burnt-on residue on glass | ~£5 |
| Oven Pride (complete kit) | Standard oven cleaning | ~£8 |
| Astonish Oven Cleaner | Standard oven cleaning | ~£3 |
| Microfibre cloths (pack of 12) | Everyday cleaning | ~£5 |
| Ceramic hob scraper kit (scraper + cleaner) | Hob cleaning kit | ~£10 |
All available at supermarkets, Boots, B&Q, or Amazon UK.
Conclusion
Regular cleaning keeps your cooker working efficiently, cooking evenly, and lasting longer. The key habits are simple:
- Wipe the hob after every use — it takes 30 seconds and prevents hours of scrubbing later
- Use the right products — dedicated hob cleaner and plastic scrapers are cheap and effective
- Don’t use abrasives — they scratch glass surfaces permanently
- Keep ventilation clear — especially on portable hobs and air fryers
- Check seals regularly — a worn oven door seal costs you money in wasted heat
If you’re considering a new cooker, read our buying guide for everything to check before you order. And if maintenance has you thinking about upgrading, see the best freestanding electric cookers for 2026.
For more appliance safety advice, the Electrical Safety First website has useful resources on safe appliance use and maintenance.